RSS Feed

Category Archives: Graphic Design

DIY Letterpress Nautical Wedding Invitations

DIY Letterpress Nautical Wedding Invitations

Hi there!

Just wrapped up these handlettered, dip-dyed, letterpressed nautical wedding invitations for a client-turned-friend (love it when that happens!) Can you say swoon? We had a great time coming up with this concept. Her groom is a captain on the high seas and although he’ll be wearing his dress whites, the event is full of whimsy. I can’t wait to show you how it all turns out. But for now, let’s talk invites.

The design is hand drawn and then edited in the computer, I got photopolymer plates made and had the design letterpressed into stupid thick 236# cotton savoy paper. Navy blue ink to match the envelopes, which I handlettered the addresses using a white gel pen.

Dip Dye Letterpress

Let’s talk dip-dying. I used scraps of my paper to test the color. I used liquid Rit dye and followed the directions on the package. Most importantly, use hot water and stir frequently. But these were so stinkin easy. Just dip the paper in for a couple seconds, lay flat on a baking sheet lined with paper towels and blot dry with dry towel. Don’t let the paper absorb too much water or the paper will warp. That would be bad. Let them air out on a drying rack and repeat the process from different angles and depths for an ombre effect. Seriously. This part was so much fun. But be careful not to fling dye all over the place in your excitement (like I did).

Dip Dye Drying Rack

Nautical Letterpress Invitation

The wedding is this weekend and I’ve done a bunch of other projects for it, can’t wait to share with you!

Love,

Liz

Quick and Lovely Typesetting Technique

Happy Valentine’s Day!

Because I love you like whoa, here’s a quick tutorial how I created this stamped design for Lionheart Prints. You can use stickers to block ink when stamping. Check it out:

1. Lay out your design using regular old scrapbooking letters.

2. Stamp all over and around it with the highest concentration in the center and work your way out. I used a round foam dobber to make the distressed circles, but you can use literally any stamp you please.

3. Remove the stickers.

4. Step back and admire!

That’s it! So easy, right? It’s kind of ridiculous. Try it and share your results! Follow me on instagram @l_lovely and tag me with your projects. Can’t wait to see how you did it!

LOVE,

liz

Valentines are for Lurvers

LurveYou

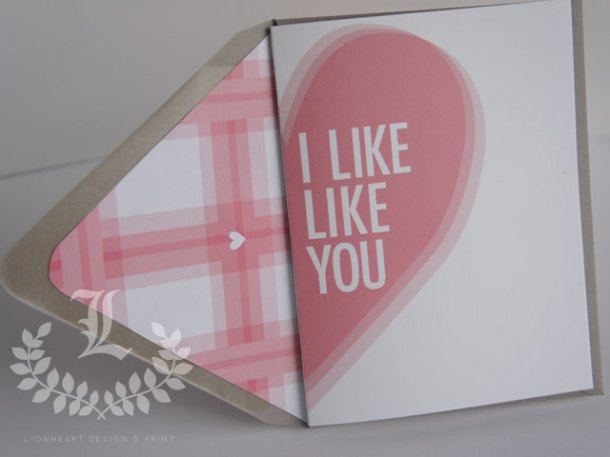
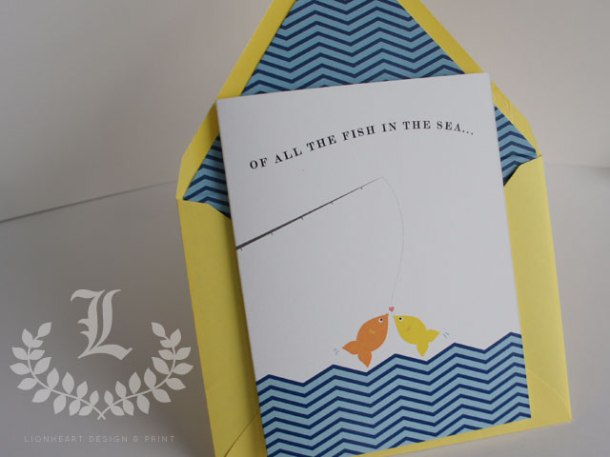
So, in my other life, I’m a graphic designer. Recently I’ve launched a line of stationery and paper products starting with a collection of Valentine’s Day cards. Designed, printed and packaged locally here in the great city of New Orleans, Lionheart Prints delivers messages of love with exuberance. The designs are printed on super-smooth thicker-than-it-needs-to-be 110lb stock and come with a single envelope. I designed coordinating envelope liners to make em even lovelier.

“I like like you” and “Fish in the Sea” are designed in Illustrator.

LikeLikeYou

Of All the Fish in the Sea, I'm so glad you're the one for me.

Of All the Fish in the Sea, I’m so glad you’re the one for me.


The cursive designs are painted by hand, scanned into the computer and digitally doctored.

LoveYouLurveYou

“Love you like whoa” typography was set by hand and embellished with stamps.LikeWhoa

Hey, maybe I’ll even write a post on how I made it. Would you like that? Lemme know!

They are available for sale here: etsy.com/shops/lionheartprints

love,

liz