RSS Feed

Kitchen Makeover Part Two: DIY Wooden Countertops

Kitchen Makeover Part Two: DIY Wooden Countertops

Hey There,

Our kitchen had some outdated linoleum countertops that were already starting to peel off. We went to the home improvement store to check out what options were available, and I’ll be darned, I must have great taste… because every surface I gravitated towards was like a million dollars a square foot. So instead, Drew had the idea of doing wooden countertops like we’d seen in magazines. I am so pleased with the result and excited to share this tutorial with you!

Keep in mind, this is part two in the Kitchen Makeover post. If you’re interested in how we refinished the existing cabinets, click here.

Here’s what you’ll need to complete this project:

Tools:

Chisel

Mitre Saw

Palm Sander

Sandpaper:

  • 40 grit – extra coarse
  • 100 grit – coarse
  • 150 grit – medium
  • 320 gril – fine

Drill

Hand Plane

Hardware & Supplies:

Wood

1.5″ Screws to attach frame to base

1 tube of Liquid Nails

2″ Paint Brush

1 qt. Sanding Sealer

1 gallon Tried & True Danish Oil

The Process:

1. Remove Existing Countertops

For us, this meant stripping the linoleum using chisels and hammers like so:

2. Get the Glue Off

Using a very coarse sandpaper (we used a 40 grit) and a palm sander, exfoliate off any remaining adhesive from the base wood of the countertops.

3. Frame The Counters

Cut pieces of your selected wood to the length of your countertop. Using a drill, screw each one into place. Leave a lip the depth of your wood, for us it was 3/4″ like so:

4. Lay it out:

Start in the corners and work your way out.

5. Glue it down:

Apply a liberal amount of Liquid Nails on the base wood, then add pieces of wood one by one. I just cut a bunch of pieces in various sizes between 8-20″ for variation. As I got to the end, I cut pieces to specific sizes.

6. Even it out:

If you have some areas that are drastically uneven between boards, use a hand plane to shave off the top. Make sure to go with the grain of wood, this will help avoid taking off big chunks. Beware: there is a razor on the bottom of this thing. It’s REAL SHARP. Be very careful!

7. Apply Sanding Sealer:

With a dang respirator on your face, paint on a generous coat of sanding sealer. After it dries, it will feel rough to the touch. That’s totally fine. It will all come off in the sanding process.

8. Sand Until Smooth:

Start with a coarse grit of 100 and work your way up to a fine grit of 320 until that surface is smooth like butta. Between each run of the sander, rub the sawdust into the cracks. This will help seal in any gaps in the end.

9. Oil Lavishly & Rub it in:

Apply a generous coat of Tried & True Danish oil. With a clean, lint-free rag wipe the excess into the wood. Repeat until satisfied.

10. Stand back and Admire:

Just look at how pretty they turned out! For about $300 in materials, these wooden countertops have a big impact. Depending on the size of your countertops, each step may take a while– but the techniques are simple and super gratifying.

And finally, let me just say…

When we began discussing countertop options, I was very hesitant to the idea of preparing food on wooden surface. Not only was I worried about germs and stuff, but I was also concerned about how stain-resistent it might be. Red wine, coffee, grease all sounded like potential threats to a beautiful wooden countertop. But my sweet husband just said, “Trust me. If it doesn’t work, we’ll rip it all up and try something else.” And with trepidation, I said okay.

Here we are, six months later and I can tell you these countertops have seen it all– red wine dribbles, cold-brew-coffee-so-strong-it-could-be-used-as-self-tanner, bacon grease and condensating beverages. And I tell you what, they look just as gorgeous as the day we finished oiling them. So, without further ado…

Honey, you were right.

What do you think?

Do you like the way they turned out? Do you think you could/would/should try this at home? How about the post– do you like having all the photos between steps? How can I make this better? Leave your thoughts in the comments section.

love, liz.

DIY Letterpress Nautical Wedding Invitations

DIY Letterpress Nautical Wedding Invitations

Hi there!

Just wrapped up these handlettered, dip-dyed, letterpressed nautical wedding invitations for a client-turned-friend (love it when that happens!) Can you say swoon? We had a great time coming up with this concept. Her groom is a captain on the high seas and although he’ll be wearing his dress whites, the event is full of whimsy. I can’t wait to show you how it all turns out. But for now, let’s talk invites.

The design is hand drawn and then edited in the computer, I got photopolymer plates made and had the design letterpressed into stupid thick 236# cotton savoy paper. Navy blue ink to match the envelopes, which I handlettered the addresses using a white gel pen.

Dip Dye Letterpress

Let’s talk dip-dying. I used scraps of my paper to test the color. I used liquid Rit dye and followed the directions on the package. Most importantly, use hot water and stir frequently. But these were so stinkin easy. Just dip the paper in for a couple seconds, lay flat on a baking sheet lined with paper towels and blot dry with dry towel. Don’t let the paper absorb too much water or the paper will warp. That would be bad. Let them air out on a drying rack and repeat the process from different angles and depths for an ombre effect. Seriously. This part was so much fun. But be careful not to fling dye all over the place in your excitement (like I did).

Dip Dye Drying Rack

Nautical Letterpress Invitation

The wedding is this weekend and I’ve done a bunch of other projects for it, can’t wait to share with you!

Love,

Liz

Quick and Lovely Typesetting Technique

Happy Valentine’s Day!

Because I love you like whoa, here’s a quick tutorial how I created this stamped design for Lionheart Prints. You can use stickers to block ink when stamping. Check it out:

1. Lay out your design using regular old scrapbooking letters.

2. Stamp all over and around it with the highest concentration in the center and work your way out. I used a round foam dobber to make the distressed circles, but you can use literally any stamp you please.

3. Remove the stickers.

4. Step back and admire!

That’s it! So easy, right? It’s kind of ridiculous. Try it and share your results! Follow me on instagram @l_lovely and tag me with your projects. Can’t wait to see how you did it!

LOVE,

liz

Happy Handiversary

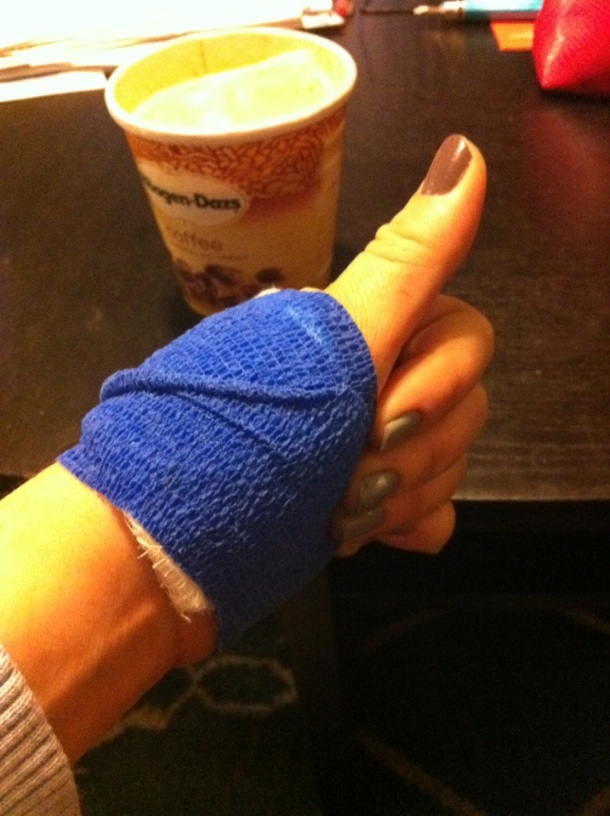
Thumbs Up_bandaged

It’s been one year since I accidentally sliced my hand open with an xacto knife.

While hanging pegboard, I had about had it with a drywall anchor that wouldn’t sink flush with our stubborn old plaster walls. This was like the third or fourth one and I was losing patience. The plastic form would get about halfway into the wall before it would smush to the side. I had had enough of it, so I reached for the craft knife on my desk a few feet away.

Now, keep in mind, I have spent hundreds of hours of my life meticulously cutting intricate designs from paper without a problem. WHICH IS KIND OF AMAZING considering that I am quite the klutz in real life. Needless to say, this wasn’t my first rodeo; I was comfortable wielding this tiny weapon.

Ok, so then it happened. I cut the anchor successfully but was using my left hand to brace the wall. Instead of doing the right thing and cutting away from my body, I did the other thing and the fresh blade incised just below my left thumb. It was a very long second before the blood rushed to the surface and I screamed.

It was a Wednesday afternoon and I was the only one home. Thankfully, we live literally across the street from an emergency room. I can only imagine the mess if I would have had to drive myself to the hospital. Phew.

I had a few very clear thoughts:

  • I need a towel to wrap this.
  • I need to make sure the dogs are inside.
  • I need my keys.

And then I walked over. Surprisingly, for me, (I can be quite dramatic) I was playing this very cool. Upon walking into two wrong entrances and calmly explaining my situation to two different sets of receptionists on duty I dry-eyed made my way across to the ER.

“What’s the matter, honey?”

“I’ve cut my hand open with an xacto knife.”

“Here, fill out this paperwork. Do you have your insurance information?”

“No, but I can get it.”

I called Drew and balancing on a breath I managed to spew out the words “um so I need our insurance information?” My pitch increasing with every syllable, “I’m in the emergency room. But everything’s ok… you don’t need to leave work.” I sounded like a pubescent boy by the end of the sentence.

Good thing he knows better. Before you could finish cooking a pot of rice he was in the ER room holding my good hand.

While waiting for him, however, I called my mom to let her know that I wouldn’t be able to email her that thing before 5 o’clock. Told her what happened but not to worry. Ha.

She said she ‘happened to know’ somebody ‘who had the same thing happen’ and the doctors weren’t careful and “THEY HAD TO AMPUTATE.” Cue my freak out.

Like a minute later the doctor walked into the room, with me now full-on blubbering, asked me “What’s the matter with you?”

Through blurry snot-and-tears I just kinda cry-yelled “I NEED BOTH OF MY HAAAANNNDS!”

It’s no secret with my friends and family that I love making things by hand and dream of hosting my own tv series teaching people how to make things too. Like Martha, but with a splash of Rachel and a little bit of Alton. You know. But to get that gig, I really need to have a ‘tv look’; preferably, that means pretty hair, big smile, small waist OH AND two of each extremity. Preferably.

I’m sure there’s some progressive studios out there and that’s cool, but really, who wants to see craft demos by the one-handed lady? I mean, yeah for a second, but then it would get weird and everyone would feel uncomfortable. Whatever. Ok, I’m just really glad I have two hands.

OK SO, the doc zapped my hand with some drugs and proceeded to thoroughly clean my wound and stitch it back together. Although I couldn’t feel it, I could kinda almost stomach watching him sew my flesh back together. Pretty soon he was done and writing me a prescription for painkillers– which we quickly filled and accompanied with lots of ice cream.

A lot of nerve endings were cut, so the whole base of my thumb was numb for several months. A year later, I have most of the feeling back in the digit that separates us from apes. When it was healing and I’d have to wash it out and change my bandages, I’d look at it and break down. Now, I’m sure that a lot of this sadness was a side effect of the prescribed opaites. But some of it was really real.

I would squirt the cucumber melon scented foaming soap onto my scar and gently rub it with my right fingertips. The sensation of feeling the stitches and seeing me feeling the stitches but not feeling me touching the stitches was upsettingly trippy. Cue my sporadic sink-side sobbing.

My pretty hand would never be the same again. I’ll always have this mark. I’ll never be the same.

Damn right.

I have never held a tool the same way again. I’m even timid around wine openers, seriously. Not out of fear, now out of respect. I look at the scar on my hand with pride and caution.

The funny thing is that I’ve always talked about getting a craft knife tattooed to my forearm. Well, now I don’t have to. I’ve got a much more badass scar instead.

This is my scar today.

This is how my scar looks today.

;

;

Ok so, because I love you and I respect your possible desire to NOT want to see bloody gory nasty photos, I did not include them in this story. However, for all you freaks out there that wanna see the gushy stuff, those photos are below.

;

;

;

;

;

;

;

;

;

Last warning, if you don’t want to see the bloody stuff,

STOP HERE.

;

;

;

;

;

;

;

;

;

;

;

Valentines are for Lurvers

LurveYou

So, in my other life, I’m a graphic designer. Recently I’ve launched a line of stationery and paper products starting with a collection of Valentine’s Day cards. Designed, printed and packaged locally here in the great city of New Orleans, Lionheart Prints delivers messages of love with exuberance. The designs are printed on super-smooth thicker-than-it-needs-to-be 110lb stock and come with a single envelope. I designed coordinating envelope liners to make em even lovelier.

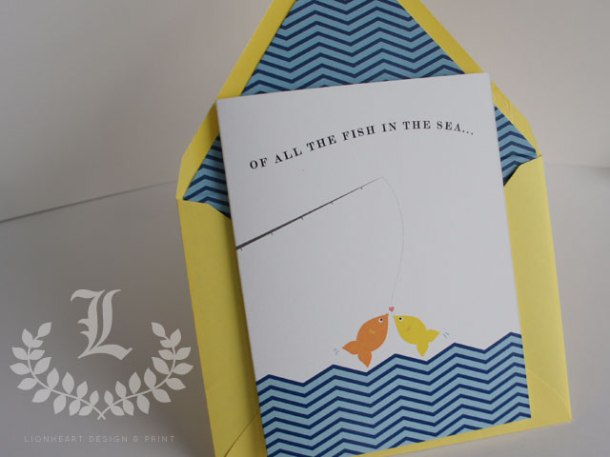
“I like like you” and “Fish in the Sea” are designed in Illustrator.

LikeLikeYou

Of All the Fish in the Sea, I'm so glad you're the one for me.

Of All the Fish in the Sea, I’m so glad you’re the one for me.


The cursive designs are painted by hand, scanned into the computer and digitally doctored.

LoveYouLurveYou

“Love you like whoa” typography was set by hand and embellished with stamps.LikeWhoa

Hey, maybe I’ll even write a post on how I made it. Would you like that? Lemme know!

They are available for sale here: etsy.com/shops/lionheartprints

love,

liz

New Favorite Thing: Kitchen Composting

The Mister and I generally try to be green-hearted, do-gooders… but despite our efforts, I have a confession to make– we are real bad at keeping up with the composting. I’ll start out all bright-eyed and brave, armed with an aluminum bowl or retrofitted milk jug plopping in the first  round of used coffee grounds, then a banana peel or two, then the inevitable onion scraps. And I’m all like

And then a few days later, the fruit flies start showing up.


And instead of you know, bringing it outside to the larger composting pile, I give up and throw it out.

BUT NOT ANYMORE! Check it out! At the last Freret Market we picked up one of these bad boys for a whopping $12.50 from local non-profit Nola Green Roots.

Keeps composting in the can-do column, and the flies outta the kitchen.


DISCLAIMER: I am really excited about this thingamajig and I just really wanted to tell you about it. The folks at Freret Market and Nola Green Roots don’t know me and they’re not giving me any money to tell you about this stuff. Just genuine, green-hearted goodness shared.

Have a great one!

Love,
Liz

Best Paint Brushes

Check it out:

I bought these brushes yesterday and I’m totally smitten. They’re eco friendly, affordable and cleaning them was effortless. The bristles are made from 100% recycled polyester, the handles are 100% bamboo (very sustainable) and even the packaging is made from totally recycled materials.

Here’s the kicker: the package of three was about $14, a few bucks less than other high quality brush sets and a few bucks more than the cheapo kinds. Lemme tell y’all… they work really, really well. The coverage was smooth and even, I hardly had any touching up to do in the end. And because the bristles are teflon coated (bad for eating, fine for painting) the paint just slid off the brush when it was time to clean up. I spent less time painting and more time hanging out with my boo– and because the clean up was so easy, I will use them again (unlike the many brushes I’ve tossed out because of dried paint).

Disclaimer: Ain’t nobody at Shur-Line or anywhere giving me money to tell y’all about this product. Just spreading the good word to all my DIY friends.

Love, Liz

P.S. With all this painting, dontcha know there’s some before and afterin’ on it’s way. For a sneak peek, check out my pinterest board on the project.

SUPER DUPER SNEAK PEEK

Hey Guys!

A little while ago, I got together with a local friends and filmmaker/producer duo, Jonathon & Kate, to shoot the first of three sample episode of The D-I-Wife. Today I am going over the footage and getting so excited to share with you– but I can’t!

So here’s a little teaser of what’s to come…

Get pumped!

love, liz.

Mold your own handles

Add your thoughts here… (optional)Have you ever heard of InstaMorph? No? Me neither! But now I want to mold all the things! What would you make?

Pickled Hedgehog Dilemma

Wired.com just posted a collection of (mostly) affordable plastics and other materials for DIY fiends.

I love these because I have been wondering how a DIY-er gets started one more out of the box projects and these seem like they would be perfect for a lot of different things.Check them out and let me know if there are more materials you would add to the list.

And feel free to comment and message me if you want to send some of these goos my way for a product review. 🙂

View original post

DIY Kitchen Makeover Part One: Refinishing Cabinets

DIY Kitchen Makeover Part One: Refinishing Cabinets

Hey friends,

The Mister and I bought our home last summer and moved in late September. And we had one very ambitious goal– to host Christmas dinner for our families. Now that might not sound like a lot, but that meant we needed to replace all the appliances, refinish the cabinets, lay down new counters oh and prepare the meal. That’s a good chunk of work. (But we love it!) Here’s how we turned this greasy outdated mess into a bright, clean and lovely kitchen– just in time for Christmas dinner.

Let me also add that we did this on a small budget. Oh lordy, I wish we could have afforded to replace all the cabinets and countertops with nice new stuff from the home improvement store, but do you know how much that stuff costs? Like thousands of dollars. And y’all, I must have such good taste, because all the things I liked the were the most expensive. HA! So we used what we had and made it better. With our own two (four) hands.

First things first…

The kitchen needed a serious de-greasing. I mean, it was pretty much deep-fried from the cabinets to the appliances– everything was just covered. We’re pretty sure whoever lived here before us cooked a lot, but didn’t clean a lot. Actually, it was pretty amazing. Here’s some photos of the build-up we had to deal with. Buhhhh… I’m not even gonna show you the inside of the dishwasher or refrigerator cause I like you guys. Just know that it was bad. Real bad. (shudders)

Under the hood

Close-up of the top of vent hood. Kind of amazing, right?

Yeah, that’s what was built up right under the heat source. It’s amazing our home didn’t catch fire before it was ours.

Super-close-up of that nast.

If the oven face is this greasy, just imagine what the wooden cabinets felt like…

buhhhhhhhhhhh…

Check out all that grease just dripping down the sides of the stove. My tummy hurts just looking at it.

Gah, isn’t he a cutie? A pallette cleanser for sitting through all those photos.

So we replaced all those bad boys and will soon pay off those credit cards 🙂 Thankfully, I worked for a badass company that offered very nice discounts on one of our client’s line of appliances. Thank you unnamed maker of our new oven, dishwasher and laundry machines. That was totally awesome.

To re-finish the cabinets, we needed to put on our respirators and de-grease all faces of the cabinets, inside and outside. First we used a citrus degreaser, which should be fine in most cases. But for us, we still had a lot of gunk, so we had to bust out the big guns. TSP stands for Trisodium Phosphate and it used to be in lots of detergents and dishwashing liquids until we realized just how bad they are for us. It’s really nasty stuff and absolutely wear a respirator mask and open all the windows when using this stuff. You can read more about it here. Unfortunately that is just how intensely gross our kitchen used to be. 

The Steps:

  • De-grease using a citrus degreaser or, if need be, TSP.
  • Remove cabinet doors and any hardware from the shelving.
  • Label all your doors using a alphanumeric system. This will help reduce confusion as you try to figure out which-cabinet-goes-where in the end. A lot of times doors will look similar in size but end up being wrong– and if you don’t label them, you won’t find out until it’s too late and you’re cussing at inanimate objects. Don’t cuss at inanimate objects.
    • I assigned each segment of cabinetry a letter (West side = A, South = B, East, C) and then in clockwise order, I assigned them a number. So I know that A4 is the fourth cabinet door on the east wall. Ladies, your loving husbands might say this is an unnecessary step and that he’ll totally know which ones go where. When this happens, smile sweetly and do it anyway. He’ll thank you when you’re not scratching your heads.

  • Paint on a layer of sanding sealer.
  • Sand by hand with a medium grit sandpaper, 150 is fine. (Also, sponge sanders are helpful for the beveled curves)
  • Repeat last two steps until satisfied.
  • Paint on a primer like Kilz.
  • Using a basic indoor paint, go nuts on your cabinets.

Once we were all done with sanding, priming, painting and drying, we re-hung the cabinet doors and enjoyed the new look! Just in time for Christmas dinner.

Coming up next…

I’ll be posting Part Two of this makeover soon and show you how we did these awesome wooden countertops for about $300 bucks!

Trust in your hands.